Author: admin

Why Your Skin Glows on Vacation but Freaks Out at Home

You know that vacation glow.

The one that appears out of nowhere around day three. Your skin looks smoother. Your cheeks have color. Your face somehow looks rested, expensive, and effortlessly filtered — even though your skincare routine is suddenly three products, your meals are random, and you may or may not have had dessert twice.

Then you come home.

Your suitcase is barely unpacked, your inbox is screaming, your laundry is judging you from the corner, and suddenly your skin decides to stage a full rebellion. Breakouts. Dullness. Texture. Redness. Oiliness. Dry patches. That mysterious bump that definitely was not invited.

So what happened?

Did your skin fall in love with the beach? Did the hotel pillow have magical powers? Did your face simply refuse to return to normal life?

Not exactly.

That vacation glow is real, but it is not magic. It is usually the result of better sleep, lower stress, more fresh air, fewer responsibilities, a slower routine, and sometimes a completely different climate. And when you return home, your skin does not just return to your old environment — it returns to your old stress, habits, schedule, pollution, water, and daily chaos.

In other words, your skin is not being dramatic.

It is reacting.

The Vacation Glow Is Not a Myth

Vacation skin often looks better because your body is finally getting what it has been begging for: rest.

When you are away, you may sleep longer, laugh more, walk outside, drink more water, eat at a slower pace, and spend less time hunched over your laptop. Your nervous system gets a break. Your face relaxes. Your jaw unclenches. Your shoulders drop. Even your expression softens.

That alone can change how your skin looks.

Stress can affect oil production, inflammation, barrier function, and breakouts. So when stress drops, your skin may look calmer, brighter, and more balanced. This is why you may notice that your face looks better even when your skincare routine is less “perfect” than usual.

Sometimes your skin does not need another serum.

Sometimes it needs a vacation from your life.

Your Skin Loves Lower Stress

At home, your skin is dealing with more than cleanser and moisturizer. It is dealing with deadlines, traffic, responsibilities, poor sleep, screen time, emotional pressure, and the constant background noise of everyday life.

Stress can trigger changes in the body that may make skin more reactive. For some people, this means acne. For others, it means eczema flares, redness, dryness, dullness, or sensitivity.

On vacation, your stress hormones may settle. You are not rushing through breakfast. You are not checking the clock every ten minutes. You are not mentally carrying seventeen tasks at once.

Your skin notices.

Then you come home, and the stress switch flips back on. Your skin goes from calm island mode to inbox emergency mode — and it shows.

You Sleep Differently on Vacation

Sleep is one of the most underrated skincare products in the world.

On vacation, many people sleep more deeply or for longer hours. Even if bedtime is later, the quality of rest may improve because the mind is less overloaded. Better sleep gives your body more time to repair, restore, and regulate.

At home, sleep often becomes the first thing sacrificed. You stay up scrolling. You answer one more message. You wake up early. You sleep with stress sitting on your chest.

The result? Puffy eyes, dull skin, more visible texture, slower healing, and a tired-looking face.

Your skin cannot fake rest forever.

A New Climate Can Change Everything

Sometimes your vacation glow has less to do with relaxation and more to do with location.

If you travel somewhere humid, your skin may look plumper because there is more moisture in the air. Fine lines can look softer. Dry patches may calm down. Your face may feel naturally dewy without needing layers of product.

If you go somewhere sunny, you may get a temporary warmth or brightness to your complexion. But be careful: a “healthy tan” is still a sign of sun exposure, and sun damage can show up later as pigmentation, fine lines, and uneven tone.

If you travel somewhere with cleaner air, less pollution, or softer water, your skin may feel less irritated. Then, when you return home to dry air, hard water, pollution, or indoor heating and cooling, your skin may suddenly feel rough, tight, or inflamed.

Your skin is basically a weather reporter.

It tells you when the environment changes.

You Touch Your Face Less

At home, you may touch your face all day without realizing it. You lean on your hand while working. You rub your forehead while stressed. You rest your chin on your palm. You pick at tiny bumps in the mirror. You press your phone to your cheek.

On vacation, your hands are busier holding sunglasses, drinks, maps, bags, cameras, or someone’s hand. You may spend less time in harsh bathroom lighting inspecting every pore.

Less touching can mean fewer breakouts, less irritation, and fewer picked spots.

Sometimes vacation skin looks better because you finally leave it alone.

Your Routine Gets Simpler

This is the plot twist.

Many people take fewer skincare products on vacation — cleanser, moisturizer, sunscreen, maybe one serum. That is it. No complicated layering. No new active every other night. No aggressive exfoliating because “the texture must go immediately.”

And suddenly the skin looks amazing.

Why? Because some skin freakouts are not caused by doing too little. They are caused by doing too much.

At home, you may be over-exfoliating, mixing too many actives, switching products too often, or trying to force results. On vacation, your routine becomes simple, gentle, and consistent. Your skin barrier finally gets a break.

Your skin may not be glowing because of the hotel air.

It may be glowing because you stopped attacking it.

Your Diet and Hydration May Shift

Vacation eating is not always “perfect,” but it is often more relaxed. You may eat fresher meals, drink more water, enjoy fruit, walk more, and feel less guilt around food.

At home, meals may be rushed, hydration may be forgotten, and caffeine may become a personality trait. This can affect digestion, energy, inflammation, and how your skin looks.

Of course, food is not the only cause of skin changes. But your skin is connected to your whole body. When your body feels supported, your skin often looks more alive.

Then You Come Home and Your Skin Panics

The return home can be surprisingly hard on your skin.

You are tired from travel. Your sleep schedule is off. You may be dehydrated from flights, long drives, or too much sun. You return to stress, pollution, indoor air, hard water, makeup, full skincare routines, and normal responsibilities.

Your skin goes from slow mornings and fresh air to alarms, deadlines, commuting, and late-night scrolling.

No wonder it freaks out.

A post-vacation breakout does not mean your skin is broken. It may simply be adjusting.

How to Bring the Vacation Glow Home

You may not be able to live permanently on vacation, but you can steal some of the habits that made your skin happier.

Simplify Your Routine

For one week after returning home, keep skincare basic: gentle cleanser, moisturizer, sunscreen, and maybe one treatment product if your skin tolerates it well. Avoid introducing multiple new products at once.

Prioritize Sleep

Give your skin a few nights of real recovery. Go to bed earlier, reduce late-night scrolling, and let your body reset.

Hydrate and Rebalance

Drink water, eat regular meals, and do not panic-treat every bump. Travel can dehydrate the skin and body, so focus on restoring balance.

Be Gentle With Exfoliation

Do not scrub your skin into submission. If your skin feels rough or congested, wait until it calms down before using exfoliating acids or retinoids again.

Clean Your Phone and Pillowcase

Small things matter. Your phone and pillowcase can collect oil, sweat, product residue, and bacteria. Cleaning them may help reduce breakouts.

Add Vacation Energy to Your Real Life

Take walks. Get sunlight safely. Laugh more. Unclench your jaw. Eat slowly. Put your phone down sometimes. Give yourself moments where you are not performing, producing, fixing, or rushing.

Your skin likes peace more than you think.

The Bottom Line

Your skin glows on vacation because your whole life changes for a moment.

You rest more. Stress less. Touch your face less. Use fewer products. Spend time outside. Sleep better. Move more. Breathe deeper. Your skin receives the message loud and clear: we are safe, we are calm, we can repair.

Then you come home, and your skin is thrown back into the noise.

So maybe the real secret is not the ocean, the hotel sheets, or the vacation photos.

Maybe the secret is that your skin finally got to meet the relaxed version of you.

And apparently, it loved her.

Can Your Skin Age Faster Because of Your Phone?

Your phone knows your face better than almost anyone.

It sees you first thing in the morning, when your eyes are half open and your skin is still waking up. It follows you through lunch breaks, late-night scrolling, video calls, selfies, messages, reels, emails, and those “just five more minutes” moments that somehow become an hour.

But here is the question nobody asks while holding a glowing screen inches from their face:

Is your phone quietly making your skin age faster?

It sounds dramatic. Maybe even a little scary. But the truth is more interesting than a simple yes or no. Your phone is not going to make your face wrinkle overnight. It is not as damaging as lying in the sun without sunscreen. But long hours of screen time may affect your skin in ways most people never think about — from blue light exposure to sleep disruption, facial tension, and the famous “tech neck.”

So before you blame your skincare routine for every fine line, dark spot, or dull morning face, it may be time to look at the device in your hand.

The Phone-Skin Connection: What Is Really Happening?

Your phone can affect your skin in a few different ways. The biggest concerns are blue light, poor posture, lack of sleep, stress, and bacteria on your screen.

None of these mean you need to throw your phone away. But if you spend hours on it every day, small habits can add up over time.

1. Blue Light May Contribute to Skin Stress

Blue light is a type of visible light emitted by the sun, LED lights, computers, tablets, and phones. Compared with UV rays, phone blue light is usually much weaker. However, repeated exposure from screens may still play a role in skin stress, especially when combined with long screen time.

Some dermatologists suggest that blue light can contribute to oxidative stress, collagen and elastin damage, and increased pigmentation in certain skin types. Cleveland Clinic dermatologist Dr. Shilpi Khetarpal explains that device light is not mainly a skin cancer concern, but it may contribute to aging by affecting collagen and elastin, and it may promote melanin production in darker skin types.

In simpler words: blue light may not be the biggest skin-aging villain, but it can be one more thing your skin has to defend itself against.

2. It May Worsen Dark Spots and Uneven Tone

If you struggle with melasma, post-inflammatory marks, or dark spots after acne, blue light may be worth paying attention to.

Research reviews have found that visible light can contribute to hyperpigmentation and may especially affect people with skin of color. A review in the Journal of the American Academy of Dermatology summarizes visible light’s role in triggering or worsening pigmentation and melanogenesis.

That means your phone may not be the only reason for uneven skin tone, but for some people, long screen exposure could make pigmentation more stubborn.

3. “Tech Neck” Can Create Lines Earlier

Your phone may age your skin in a way that has nothing to do with light.

Think about your posture. Most people do not hold their phone at eye level. They look down. Their chin drops. Their neck folds. They stay like that for minutes, then hours, then years.

Over time, repeated creasing can contribute to horizontal neck lines, sagging, and tension around the jaw. This is often called “tech neck.” The skin on the neck is thinner and more delicate than many people realize, which means it can show aging signs faster than expected.

Your phone does not have to touch your skin to leave a mark. Sometimes, the damage comes from the angle.

4. Late-Night Scrolling Can Steal Your Skin’s Repair Time

Your skin does some of its best repair work while you sleep. Poor sleep can make your face look dull, tired, puffy, and older than it really is.

Now think about what happens when you scroll in bed. One video becomes ten. One message turns into a conversation. Suddenly, midnight becomes 1:30 a.m.

Blue light can also affect your sleep rhythm, making it harder for your body to wind down. Less sleep can mean more stress hormones, slower recovery, and skin that looks less fresh the next day.

Sometimes the problem is not just the phone’s light. It is the sleep your phone steals.

5. Your Phone Screen Can Transfer Bacteria to Your Skin

Your phone goes everywhere: your hands, your desk, your bag, your car, maybe even the bathroom. Then it touches your face.

That can transfer oil, dirt, sweat, and bacteria to your skin. For acne-prone people, this may contribute to breakouts along the cheek, jawline, or side of the face where the phone rests.

This is not exactly “aging,” but inflammation and repeated breakouts can leave marks, texture, and uneven tone that make skin look older or less healthy.

Can Your Phone Really Cause Wrinkles?

Your phone alone is unlikely to be the main cause of wrinkles. Sun exposure, genetics, smoking, pollution, stress, diet, and natural aging are still major factors.

But your phone can contribute indirectly.

Long hours of screen time may increase facial tension, reduce sleep, encourage poor posture, expose your skin to blue light, and keep your face close to a bacteria-covered surface. Over time, these habits may make skin look more tired, dull, lined, or uneven.

So the better question is not, “Is my phone ruining my skin?”

The better question is, “Are my phone habits helping my skin age faster?”

How to Protect Your Skin Without Giving Up Your Phone

You do not need to quit screens. You just need smarter habits.

1. Wear Sunscreen Daily

A broad-spectrum sunscreen is still one of the best anti-aging tools. If you are concerned about visible light and pigmentation, consider a tinted sunscreen with iron oxides, which can help protect against visible light.

2. Use Antioxidants

Antioxidants like vitamin C, niacinamide, green tea, and other protective ingredients may help defend the skin from oxidative stress. Reviews on visible light and skin health highlight the role of antioxidants in reducing visible-light-related skin effects.

3. Hold Your Phone Higher

Bring your phone closer to eye level instead of bending your neck downward. This simple habit may reduce neck creasing and tension.

4. Take Screen Breaks

Follow a simple rule: every so often, look away, stretch your neck, relax your jaw, and blink. Your skin, eyes, and posture will all appreciate it.

5. Stop Scrolling Right Before Bed

Try to give yourself screen-free time before sleeping. Better sleep can make a visible difference in how your skin looks and feels.

6. Clean Your Phone Regularly

Wipe your phone screen often, especially if you hold it against your face. This can help reduce oil and bacteria transfer.

The Bottom Line

So, can your skin age faster because of your phone?

Possibly,  but not in the dramatic overnight way people imagine. Your phone is not stronger than the sun, and it is not the only reason skin ages. But heavy phone use may contribute to skin aging through blue light exposure, poor sleep, repeated neck creasing, facial tension, and bacteria transfer.

The good news is that you do not have to choose between your phone and your skin. Small changes can make a big difference: wear sunscreen, use antioxidants, hold your phone higher, sleep better, and clean your screen.

Your phone may be part of modern life, but premature aging does not have to be.

Can You Really Vape, Smoke & Sip Coffee With Aligners In?

We asked. We tested. The answer is more forgiving than your orthodontist let on.

— — —

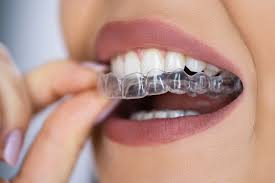
You didn’t pick clear aligners by accident. You picked them because you still wanted to be you… someone who grabs a coffee on the way to work, catches up with friends, lives without a mouth full of metal announcing itself in every photo.

And then, somewhere between the fitting and the first tray, the warnings start. A friend who went through it. A Reddit rabbit hole at midnight. Even your hygienist, well-meaning as ever, sliding a laminated sheet across the counter: avoid coffee, avoid vaping, basically avoid anything that isn’t still water.

Suddenly the “flexible” option doesn’t feel all that flexible.

“Aligners are more forgiving than you’ve been told — but only if you know where the line is.”

Here’s the unfiltered truth we tell every single patient at Elara. And yes, we’re going to be honest even when the answer isn’t as simple as “just don’t.”

— — —

The real enemy isn’t your coffee. It’s heat.

Think of your aligner as a very precise, very patient piece of engineering. It’s not yanking your teeth anywhere, it’s nudging them, slowly, over weeks, with just enough pressure to get the job done without your mouth noticing.

That precision is the whole point. And the thing that kills it fastest isn’t coffee. It isn’t nicotine. It’s heat.

A warped tray is a useless tray. It no longer fits the way it was designed to, which means the pressure goes off, the movement stops, and your timeline quietly extends, without anyone telling you it has.

THE THREE HABITS — WHAT ACTUALLY HAPPENS

•       Coffee & Tea — Hot beverages can warp the tray. Iced or room-temp versions are a different story entirely. It’s the heat, not the caffeine that’s the problem.

•       Vaping — Propylene glycol leaves a sticky film inside the aligner that traps bacteria and clouds the plastic. Manageable if cleaned consistently; a problem if ignored.

•       Smoking — Nicotine stains the trays and locks residue against enamel. Remove and rinse thoroughly. Every. Single. Time.

Notice a pattern? It’s not about banning anything. It’s about one consistent habit:

Remove before. Rinse after. Reinsert clean.

— — —

The protocol that actually works.

Most aligner advice assumes you’ve given up coffee, quit smoking, and have nothing better to do than clean your trays every hour. Good for them. That’s not most people!

Here’s what actually works for people with real lives.

  1. Take it out first. Always. No exceptions. Ten minutes with your tray sitting on the table beats spending an extra month in treatment because the plastic warped. Make it a reflex, like putting your phone down before you eat.
  2. Rinse straight after. Not a full brush, not a production. Just water. Thirty seconds under the tap clears out most of what would otherwise sit against your teeth for hours. It’s the lowest-effort thing on this list and probably the most underrated.
  3. Give the tray a proper clean once a day. A soft toothbrush, a drop of clear unscented soap, done. You’re not scrubbing, you’re just staying ahead of the invisible film that builds up whether you can see it or not.
  4. Know your numbers. Twenty-two hours in, two hours out. That’s your daily budget. A morning coffee, a cigarette break, an evening glass of wine, it all fits comfortably inside two hours if you’re not leaving the tray out and forgetting about it.

22

Hours per day of wear keeps treatment on schedule. Two hours is more than enough for all your habits combined.

— — —

Why aligners still win — even with the rules.

The key advantage of aligners isn’t that they have no rules. It’s that you are in control of those rules. With braces, there’s no choice. Here’s how the two compare:

Traditional BracesClear Aligners
✗  Coffee stains ceramic brackets permanently✓  Remove for coffee — tray stays clear
✗  Smoke and tar trapped permanently around brackets✓  Smoke with tray out. Rinse. No one knows.
✗  No choice — every habit hits the hardware✓  Full autonomy. Your life, your timing.

With braces, you are a passenger in your own treatment. With aligners, you are the driver. The rules aren’t restrictions, they’re the steering wheel.

— — —

The honest bottom line.

“A patient who removes their tray for every coffee finishes in six months with a perfect smile. A patient who skips this step finishes… eventually.”

You can vape. You can smoke. You can have your flat white, your evening glass of red, your morning matcha. Aligners were designed for real people with real habits.

What aligners were not designed for is neglect. The difference between a six-month success and an eight-month frustration usually comes down to one habit practiced consistently. Or not.

At Elara, we’d rather equip you with the truth than a rulebook you’ll quietly ignore. So, remove, enjoy, clean, reinsert. That’s it. That’s the whole secret.

— — —

Ready to start your treatment?

Melasma Treatment, Causes And Prevention

Skin health plays a vital role in our confidence and self-esteem, and conditions like melasma—a common yet often misunderstood issue—can leave many feeling self-conscious. Characterized by brown or blue-gray patches on the face and other sun-exposed areas, melasma is sometimes called the “mask of pregnancy” due to its prevalence among expectant mothers. While harmless, its unpredictable nature and impact on appearance make it a concern for many. Let’s explore what causes melasma, how to treat it, and practical steps to prevent its recurrence.

What is Melasma?

Melasma is a pigmentation disorder where overactive melanocytes (skin cells responsible for color) produce excess pigment, leading to irregular patches. These patches often appear on the cheeks, forehead, upper lip, chin, and sometimes the neck or forearms. The condition affects 1.5%–33% of the population, with women—particularly those aged 20–40—being 9 times more likely to develop it than men. During pregnancy, hormonal shifts cause 15%–50% of women to experience melasma, which often fades postpartum but can persist without proper care.

Melasma’s intensity fluctuates with sun exposure, often worsening in summer and improving in winter. Its patterns vary:

Epidermal: Superficial, dark brown patches with clear edges. Responds well to treatment.

Dermal: Deeper, bluish-gray patches with blurred borders. Resistant to treatment.

Mixed: A combination of both, offering partial improvement with therapy.

What Causes Melasma?

While the exact mechanism isn’t fully understood, two primary factors drive melasma: radiation (sunlight, heat, or LED screens) and hormones. Secondary triggers include:

Hormonal Changes: Pregnancy, oral contraceptives, or hormone therapies elevate estrogen/progesterone, stimulating melanocytes.

Sun Exposure: UV rays and infrared radiation worsen pigmentation. Even brief sun exposure can reactivate melasma.

Genetics: 33%–50% of cases have a family history.

Medications: Antiseizure drugs, phototoxic antibiotics, and certain skincare products can trigger it.

Lifestyle Factors: LED screens (phones, laptops), harsh soaps, and tanning beds exacerbate pigmentation.

Risk Factors

Skin Type: Those with olive or darker skin tones (Fitzpatrick III–VI) are more prone.

Gender: Women, especially during reproductive years.

Thyroid Issues: Hypothyroidism increases susceptibility.

Skincare Habits: Irritating products or treatments that inflame the skin.

Effective Treatments for Melasma

Managing melasma requires a dual approach: preventing progression and targeting existing patches.

1. Prevention and Daily Care

Sun Protection: Use a mineral sunscreen with SPF 30–50 and iron oxides (blocks visible light). Reapply every 2 hours.

Avoid Triggers: Opt for non-hormonal birth control, limit screen time, and wear wide-brimmed hats.

Gentle Skincare: Avoid abrasive scrubs or irritating ingredients like alcohol-based toners.

2. Topical Treatments

Hydroquinone (2%–4%): Gold standard for lightening patches; used nightly for 2–4 months.

Azelaic Acid: Safe for pregnancy, reduces inflammation and pigmentation.

Tranexamic Acid: Blocks pigment transfer; available as creams, injections, or oral tablets.

Vitamin C and Soybean Extract: Antioxidants that brighten skin and inhibit melanin.

Retinoids (Tretinoin): Promotes cell turnover but avoid during pregnancy.

3. Procedures

Chemical Peels: Glycolic or salicylic acid peels exfoliate the epidermal layer.

Laser Therapy: Targets deeper pigment, though results vary by melasma type.

4. Holistic Approaches

Diet: Antioxidant-rich foods (berries, leafy greens) combat oxidative stress.

Stress Management: Cortisol spikes can worsen pigmentation.

Preventing Recurrence

Melasma is chronic and prone to relapse. Consistent habits are key.

Year-Round Sunscreen: Even on cloudy days or indoors (LED light protection).

Non-Comedogenic Makeup: Choose products labeled “non-pore-clogging” to avoid irritation.

Regular Dermatologist Visits: Monitor skin changes and adjust treatments.

Living with melasma can be challenging, but understanding its triggers and adopting a proactive skincare routine can make a significant difference. While some cases resolve postpartum or with treatment, others require long-term management. Remember, patience is vital—melasma fades gradually, and rushing treatments can irritate the skin further.

Elara Skincare offers personalized solutions to combat melasma and other skin concerns. Our expert-guided treatments, from medical-grade topicals to advanced therapies, are designed to restore your skin’s radiance. Visit us to embark on a journey toward healthier, glowing skin—because everyone deserves to feel confident in their complexion. Follow the link to book your very own session and get started on treating your skin-related issues.

Book an appointment at:

Different Types Of Acne

Acne. Millions of people find this word frustrating, but it’s frequently misinterpreted as just “teenage breakouts.” The truth is much more nuanced. The official word for this extremely common skin disorder is acne vulgaris, which is caused by dead skin cells and oil (sebum) clogging hair follicles. Bacteria flourish in this ideal habitat, causing irritation and the unpleasant pimples. However, acne is not all the same. The crucial first step to receiving appropriate therapy and avoiding long-term harm is knowing which type you’re dealing with.

Why Knowing Your Acne Type is Non-Negotiable?

Consider using an antifungal cream to treat a bacterial infection; it would be ineffective. In a similar vein, applying blackhead-treatment items to painful, deep cysts is ineffectual and may exacerbate inflammation. The treatment plan is determined by the type of acne you have. While severe, inflammatory forms necessitate professional medical intervention to prevent irreversible scarring, mild, noninflammatory variants frequently respond to over-the-counter (OTC) therapy.

The Two Main Categories: Inflammatory vs. Noninflammatory

Acne is broadly classified based on whether it causes significant inflammation (redness, swelling, pain):

Noninflammatory Acne: 

Cause: Primarily blocked pores without significant bacterial overgrowth or immune system reaction.

Severity: Generally the mildest form.

Risk: Low risk of scarring if treated properly and not picked.

Subtypes:

Whiteheads (Closed Comedones): The pores are totally sealed off. Small, flesh-colored or white pimples are created when sebum and dead skin cells become trapped beneath the skin’s surface. The pore is sealed off. Imagine them as small, airtight capsules beneath the skin.

Blackheads (Open Comedones): A portion of the pores are occluded. When the clog—a mixture of dead skin and sebum—is exposed to air, it oxidizes and turns dark, like an apple browning, but it is not dirt. They resemble tiny, open, dark dots that are flat or slightly elevated. Although they are typically less irritated, they can be stubborn.

Inflammatory Acne: 

Cause: Blocked pores become infected with C. acnes bacteria. The body’s immune system attacks this infection, causing inflammation (redness, swelling, pain, pus). This is where significant damage and scarring potential arise.

Severity: Ranges from moderate to severe.

Risk: High risk of scarring (including pits and dark spots), especially if lesions are deep or picked/squeezed.

Subtypes (Increasing in Severity):

Papules: Small, tender, pink or red bumps without visible pus. They feel solid to the touch. These are inflamed hair follicles where the wall has started to break down under pressure. Picking can worsen inflammation and lead to scarring.

Pustules: Similar to papules but contain visible pus, forming a white or yellow center with a red, inflamed base—the classic “pimple” or “zit.” The pus is a mix of dead white blood cells and bacteria. Squeezing increases scarring risk significantly.

Nodules: Large (often larger than 5 mm), solid, extremely painful lumps deep under the skin’s surface. They develop when clogged, swollen follicles rupture deep within the dermis, causing intense inflammation. Nodules lack a visible “head” and feel hard. Medical treatment is essential as they persist for weeks or months and cause deep scarring.

Cysts (Cystic Acne): The most severe form. Cysts are large, pus-filled, painful lumps deep within the skin, similar to boils. They are soft, fluid-filled, and extremely inflammatory. Cysts form deep ruptures that wall off, creating sac-like lesions. This type absolutely requires dermatological care. Cystic acne has the highest risk of causing severe, permanent scarring.

It’s a must to take care of your skin and also learn about the various types of acne so that you can tackle the problem with proper and specialized medication, which in turn helps smoothen the process of treatment for your acne problem. To have the best-in-class treatment for your acne problems, you can visit Elara Clinics, which specializes in treating almost all skin-related issues. To learn more on the types of acne, you can follow the link: https://elaraclinics.com/skin/skin-conditions/acne/

Also book your appointment at Elara by following the link given below:

https://elaraclinics.com/book-an-appointment/

What are the various steps for Laser Tattoo Removal?

With advancements in technology, now people have various options and methods to remove tattoos from their bodies. Among them, Laser tattoo removal is known as one of the most effective and secure techniques to remove tattoos with fewer side effects than other methods.

In this method, dermatologists  use  lasersto send out high-intensity pulses of light that target the ink inside your tattoo but leave the skin around it alone. When high-intensity pulses of light strike the ink, the ink absorbs these pulses of light, and it begins to heat up. This heat makes the ink break into tiny pieces, which your immune system can then clear away. Your tattoo starts to fade as the ink goes away.

Various Steps of Laser Tattoo Removal

Step 1: Go to your nearest laser tattoo removal Clinic

Firstly, contact your nearest laser tattoo removal clinic where you can get professional dermatologists(Professionals in skin care) . We prefer you to visit Elara Clinic, where you can get laser tattoo removal from professionals fully concerned with your skin care as well. Here, they will see your skin condition as well as the overall view of your tattoo to see the further treatment that can be done with laser tattoo removal treatment. They will ask any question related to your tattoo so that they can further go ahead with the process. They might also take a picture of your tattoo to show the comparison of “before” and “after”. 

Step 2: things to be done before the treatment 

After confirmation of your skin health and overall tattoo view, now the doctor  will go further ahead with the process of laser tattoo removal. Here are some of the things that are considered before the treatment is started:

  • You‘ll be given a pair of sunglasses to protect your eyes from any laser light effects.
  • The doctor  will clean up your tattoo area and let it dry 
  • If you have darker skin, then the doctor might put a cold pack or cooling gel on the tattoo area as darker skin absorbs heat faster than others.
  • The doctor  will either give you a shot of numbing medication or put numbing cream on the area they’re going to be treating. 

Step 3: moving toward the treatment

After all the things are confirmed, now the treatment starts. They might do a quick patch test to see how your skin reacts. This will help them decide what kind of lasers and techniques will give you the best results. Now the doctor will use the laser to pass pulses of light through your skin where the tattoos are meant to be removed. The ink in your tattoo absorbs this light and starts to break down into small pieces. They might pass the laser over your tattoo at least a few times, and sometimes they wait a little while in between passes. You might get a little uncomfortable and feel a little pain during the treatment. On that condition, further treatment can be done.

Smaller tattoos will require fewer pulses, while larger ones will need more to remove them. In either case, it takes several treatments to completely get rid of a tattoo. After each visit, your tattoo should become lighter.

Step 4: Laser tattoo removal Aftercare 

After the treatment is completed, the doctor will give you certain tips to take care of your skin. Some of the basic care are: 

  • Use Ice packs 
  • Put antibiotic ointment or cream on the area for a few days
  • Use petroleum jelly or unscented moisturizer under your bandage
  • Keep the area clean, but avoid scrubbing it
  • Avoid tight clothing
  • Wear sunscreen, and avoid exposing the area to direct sunlight
  • Don’t pick or scratch at scabs or blisters